Making Things Better: How to Line a Cake Tin
- November 09, 2017
Lining a cake tin is surely the most annoying task in all of baking? Not any more! Our Product Developer, Laura is here to show you her ingenious tips to take the bore out of this chore.
The trick is to brush the tins with water (instead of butter) to make the paper stick. The water evaporates during the baking process, which gently lifts the paper away from the tin, making it easier to remove your lovely fresh cake! Also, controversially, we’re anti-butter greasing when it comes to lined tins – the fat reaches a much higher temperature during the baking process and can leave a scorched outer cake – oh no!
Here are a few little step-by-steps to take your cake-lining game to the next level, whatever the shape of your bake:
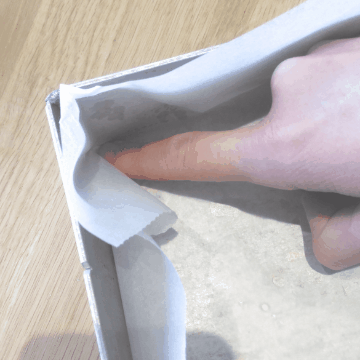
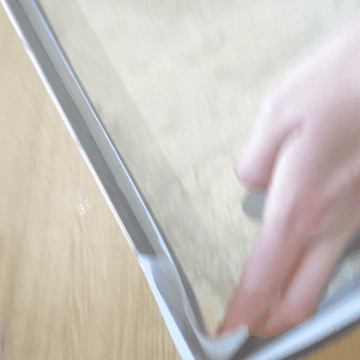
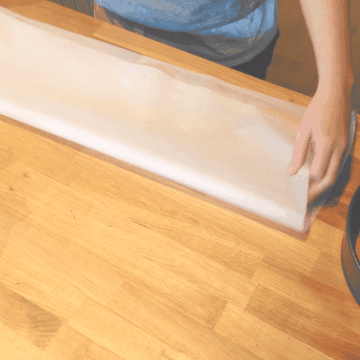
LOAF TIN
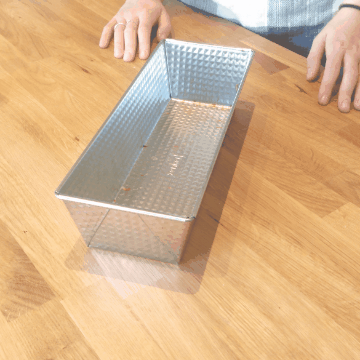
Step 1. Spray/brush your loaf tin with water. Tear your baking paper to three times the width of your loaf tin.
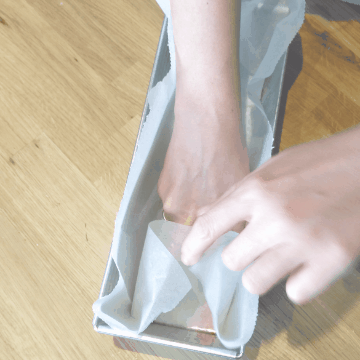
Step 2. Using your palm, push the paper down into the tin. Use your index and middle finger to go into the corners and make the fold at the end of the tin.
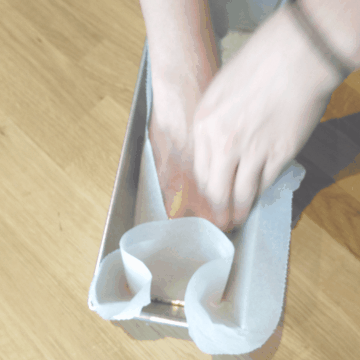
Step 3. Repeat at the other end, and fold down over the edges, pinching with your thumb and index finger, so that the paper slightly overhangs the edge of the tin.
TRAY BAKE
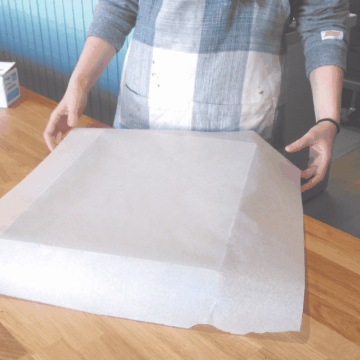
Step 1. Spray/brush the tin with water. Tear your paper about 2 inches larger than your tray on every side. Push it down loosely into the tin.
Step 2. Using your index and middle finger, create a fold and push into the corner.
Step 3. Repeat on all sides so that the paper lies flat, and you’re ready to bake!
ROUND TIN
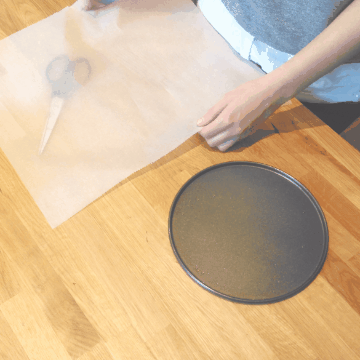
Step 1. Start with the round tin base. Cut a square of paper larger than the circle, and fold into quarters. Make a third fold to create a triangle.
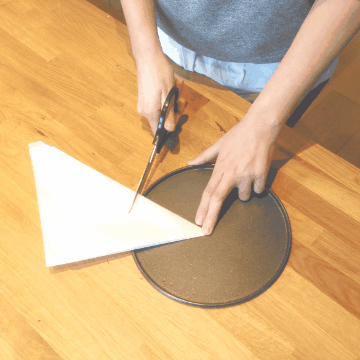
Step 2. With the point of the triangle held at the centre of the tin base, cut the paper using the tin as a guide. Brush with water, unfold, and stick the paper to the tin.
Step 3 Cut a length of paper and fold length-ways into quarters. Cut along one of the folds to make a strip of paper (you can save the rest for another day)

Step 4. Brush the rest of the tin with water, insert the base, and curl the strip of baking paper around the inside – taa-daah!